Second Layer
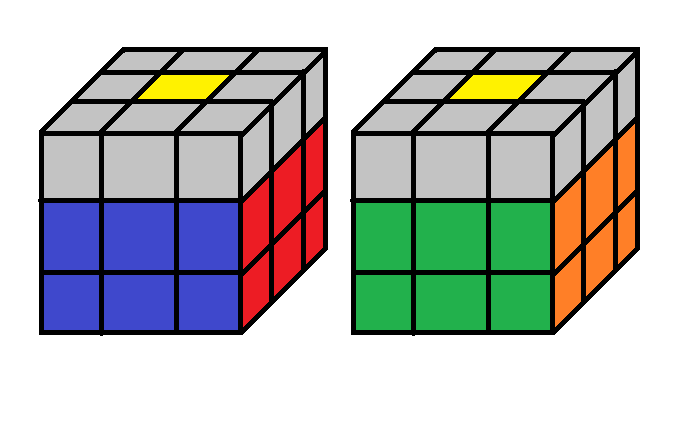
The next step in solving your cube is solving the middle layer. This involves placing and orienting at most four edges. It is less intuitive than the past two steps, and is algorithm-based. When finished with this step, the below picture depicts what your cube will look like.
The first step is to find an edge in the top layer that does not have white as one of its two colors. Now rotate the cube so that the face that has the same color as the front of the edge faces frontward. Then rotate the top layer so that the front color of the edge matches with the color of the center in the front. You should have a line of 3 of the same color in the front going vertically. Another characteristic of this edge is that the color on top will be the same as one of the centers on the left or right. Using this information, you need to determine if the edge will need to move down-and-to-the-right or down-and-to-the-left to be put into place. Then perform one of the following algorithms.
If the edge needs to move down-and-to-the right, perform U R U' R' U' F' U F.
If the edge needs to move down-and-to-the-left, perform U' L' U L U F U' F'.
If none of the above made sense, below is a slideshow to demonstrate.
If the edge needs to move down-and-to-the right, perform U R U' R' U' F' U F.
If the edge needs to move down-and-to-the-left, perform U' L' U L U F U' F'.
If none of the above made sense, below is a slideshow to demonstrate.
Problems you may run into
When solving the second layer, there are two main problems you can run into. One of which is that that all edges in the top layer will have yellow in them, and your second layer is not completely solved. The other, similar case is that one or more of your edges could be in the correct place, but they are incorrectly oriented.
When there are no edges without yellow in the top layer, but your second layer is not solved, that means that one or more of your edge pieces in the second layer need to be switched around. To solve this, simply put a yellow edge piece into the place of an incorrectly placed piece by using either of the algorithms. Then, you can use this now removed edge piece, and put it into its correct position using an appropriate algorithm.
When you have an edge in the correct place, but incorrectly oriented, you'll do a similar process. Remove it from its current position by performing one of the algorithms and inserting a yellow piece instead. Then, you now have freedom to re-orient it by doing the correct algorithm.
A slideshow below demonstrates these processes.
If your cube looks like the one at the top of the page. It is now time to move onto finishing the last layer, which is divided into several sub-steps. The first of which is Yellow Edges, in which you will orient the four yellow edges.
This page was last edited on November 30, 2013.